Arduino UNOでTFT液晶(ST7735)を使う(1)

Arduino UNOでTFT液晶を使ってみます。

TFT液晶はこれです。
https://www.aliexpress.com/item/32671985734.html

参考にしたサイト:
https://simple-circuit.com/draw-bmp-images-arduino-sd-card-st7735/

  1. Arduiono IDEに必要なライブラリを追加する
  2. ブレッドボードで接続する
  3. 実行する

必要なもの

  • Arduino UNO * 1
  • TFT液晶 * 1
  • ブレッドボード * 1
  • 抵抗 1kΩ * 5

1. Arduiono IDEに必要なライブラリを追加する

以下の3つを追加します。

  • Adafruit BusIO
  • Adafruit ST7735 and ST7789 Library
  • Adafruit GFX Library

2. ブレッドボードで接続する

TFT液晶側は以下のピン配置になっています。

1 RST
2 CS
3 D/C
4 DIN
5 CLK
6 VCC
7 BL
8 GND

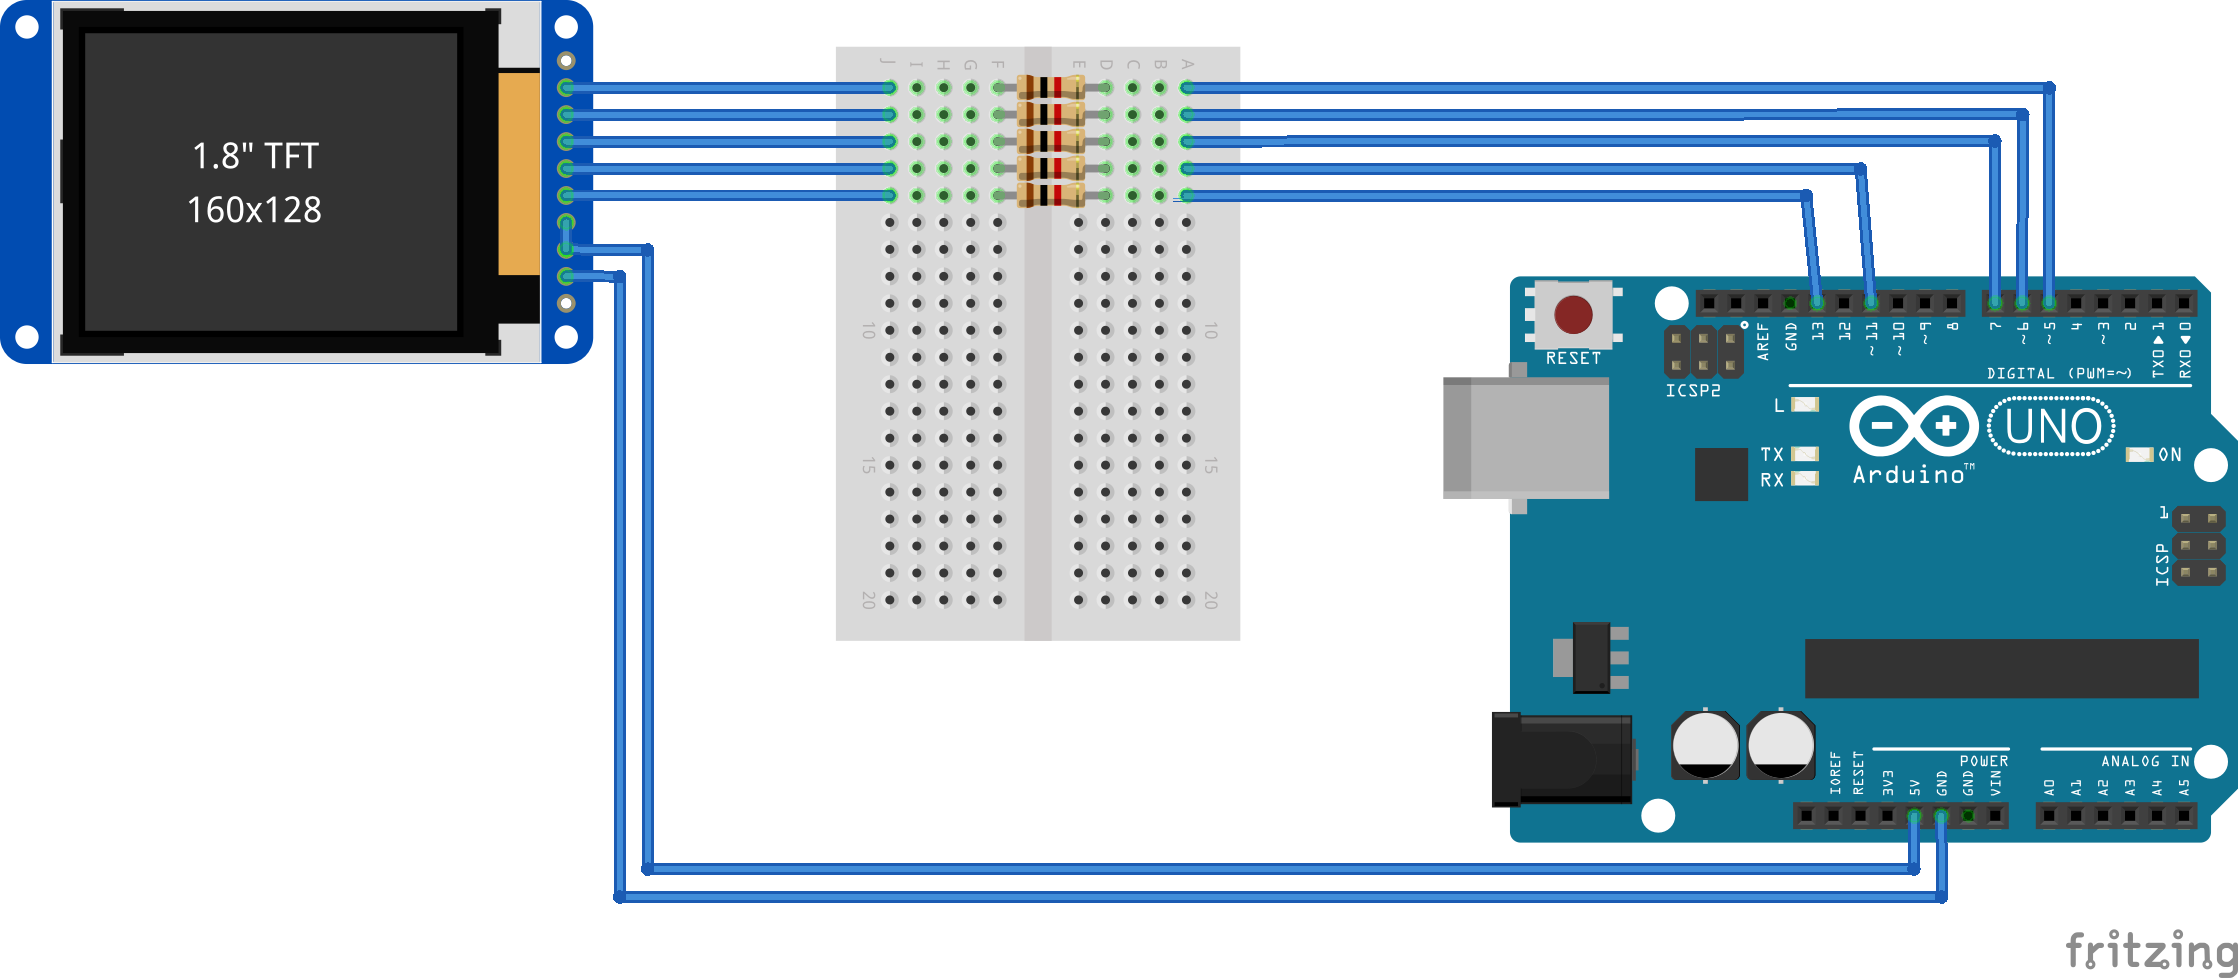
以下のように接続します。

回路

Arduino UNOの出力電圧は5Vですが、ST7735は3.3Vで駆動します。そのため1kΩの抵抗をはさみます。

3. 実行する

1
2
3
4
5
6
7
8
9
10
11
12
13
14
15
16
17
18
19
20
21
22
23
24
25
26
27
28
29
30
31
#include <Adafruit_GFX.h>
#include <Adafruit_ST7735.h>
#include <SPI.h>

#define TFT_RST 5
#define TFT_CS 6
#define TFT_DC 7

Adafruit_ST7735 tft = Adafruit_ST7735(TFT_CS, TFT_DC, TFT_RST);

void setup(void) {'
pinMode(TFT_CS, OUTPUT);
digitalWrite(TFT_CS, HIGH);

tft.initR(INITR_BLACKTAB);
// tft.initR(INITR_GREENTAB);

tft.fillScreen(ST77XX_BLUE);
testdrawtext("Lorem ipsum dolor sit amet, consectetur adipiscing elit. Curabitur adipiscing ante sed nibh tincidunt feugiat. Maecenas enim massa, fringilla sed malesuada et, malesuada sit amet turpis. Sed porttitor neque ut ante pretium vitae malesuada nunc bibendum. Nullam aliquet ultrices massa eu hendrerit. Ut sed nisi lorem. In vestibulum purus a tortor imperdiet posuere. ", ST77XX_WHITE);
delay(1000);
}

void testdrawtext(char *text, uint16_t color) {
tft.setCursor(0, 0);
tft.setTextColor(color);
tft.setTextWrap(true);
tft.print(text);
}

void loop() {}

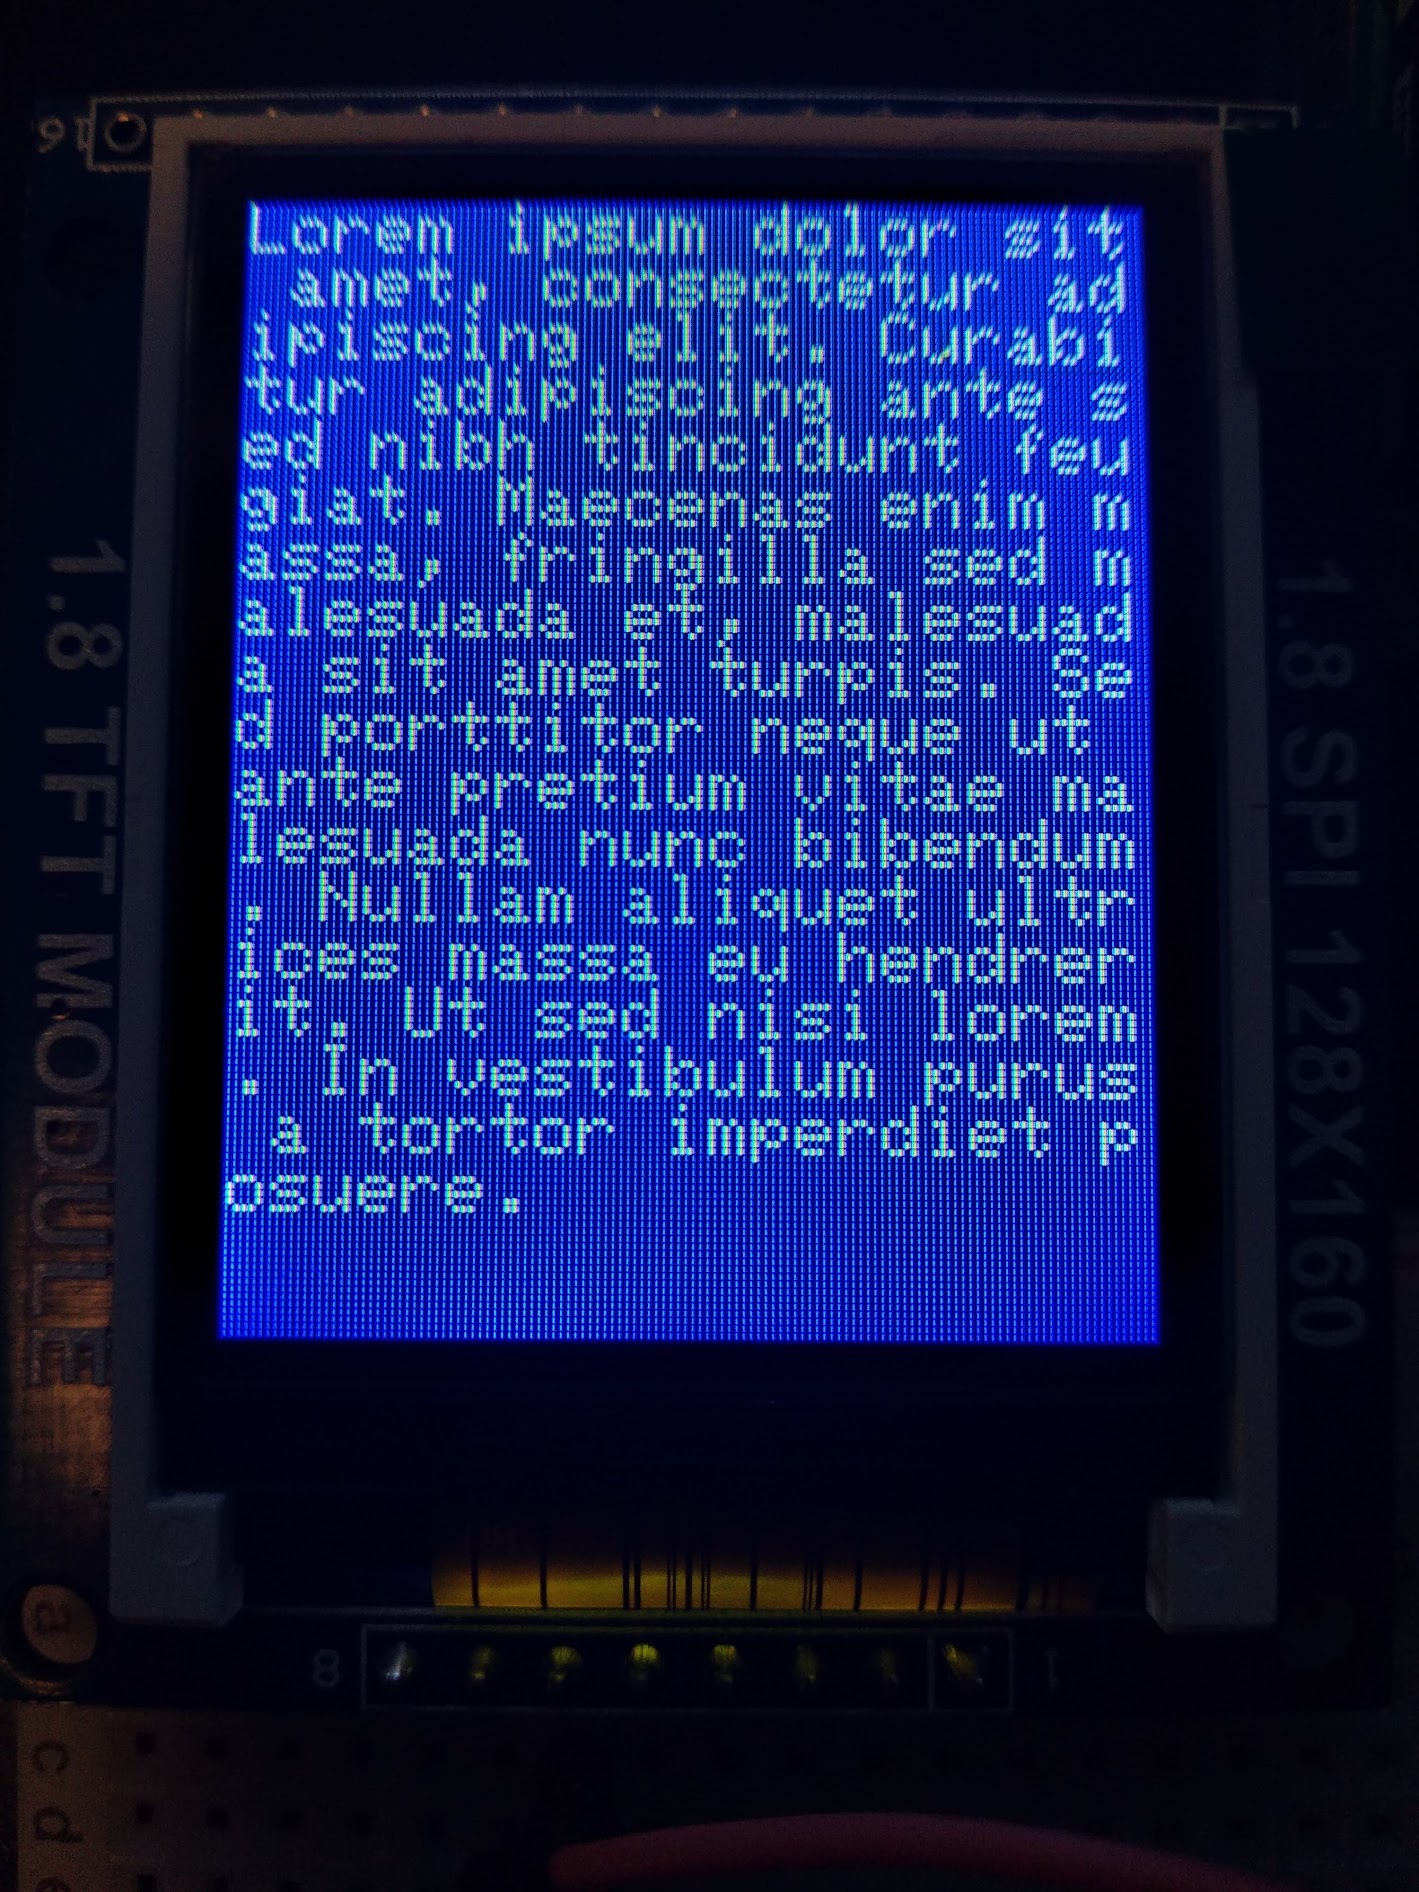
実行結果:

実行結果